Introduction to Browser testing
Since we are writing top-down tests we need to have tests that interact with the browser since that's the "top" for our users.
This is where a product called Playwright comes in.
An automatic flow
Before we start using Playwright for our testing, let's first write our first automatic flow with it against our real application.
Installation
First, let's install Playwright at the Customers.WebApp.Auto project under 2.UiTesting/src.
You can install it as a Nuget package either by using your IDE's Nuget client or by running:
dotnet add package Microsoft.Playwright
Now build the project either using your IDE or by running:
dotnet build
This will create a few files under the Customers.WebApp.Auto\bin\Debug\net6.0 folder.
What we need to do is run the file called playwright.ps1. You will need to have powershell installed to run it.
PowerShell is cross platform and can be installed here.
pwsh bin/Debug/netX/playwright.ps1 install
Once that's done, you're ready to start writing your first flow.
An alternative to the approach above is to create a console app that only contains the following line, and run it:
Microsoft.Playwright.Program.Main(new string[] {"install" });
Scenario: Creating a customer
Our goal here is to use Playwright, to automate the creation of a customer. This is the view we are going to automate:
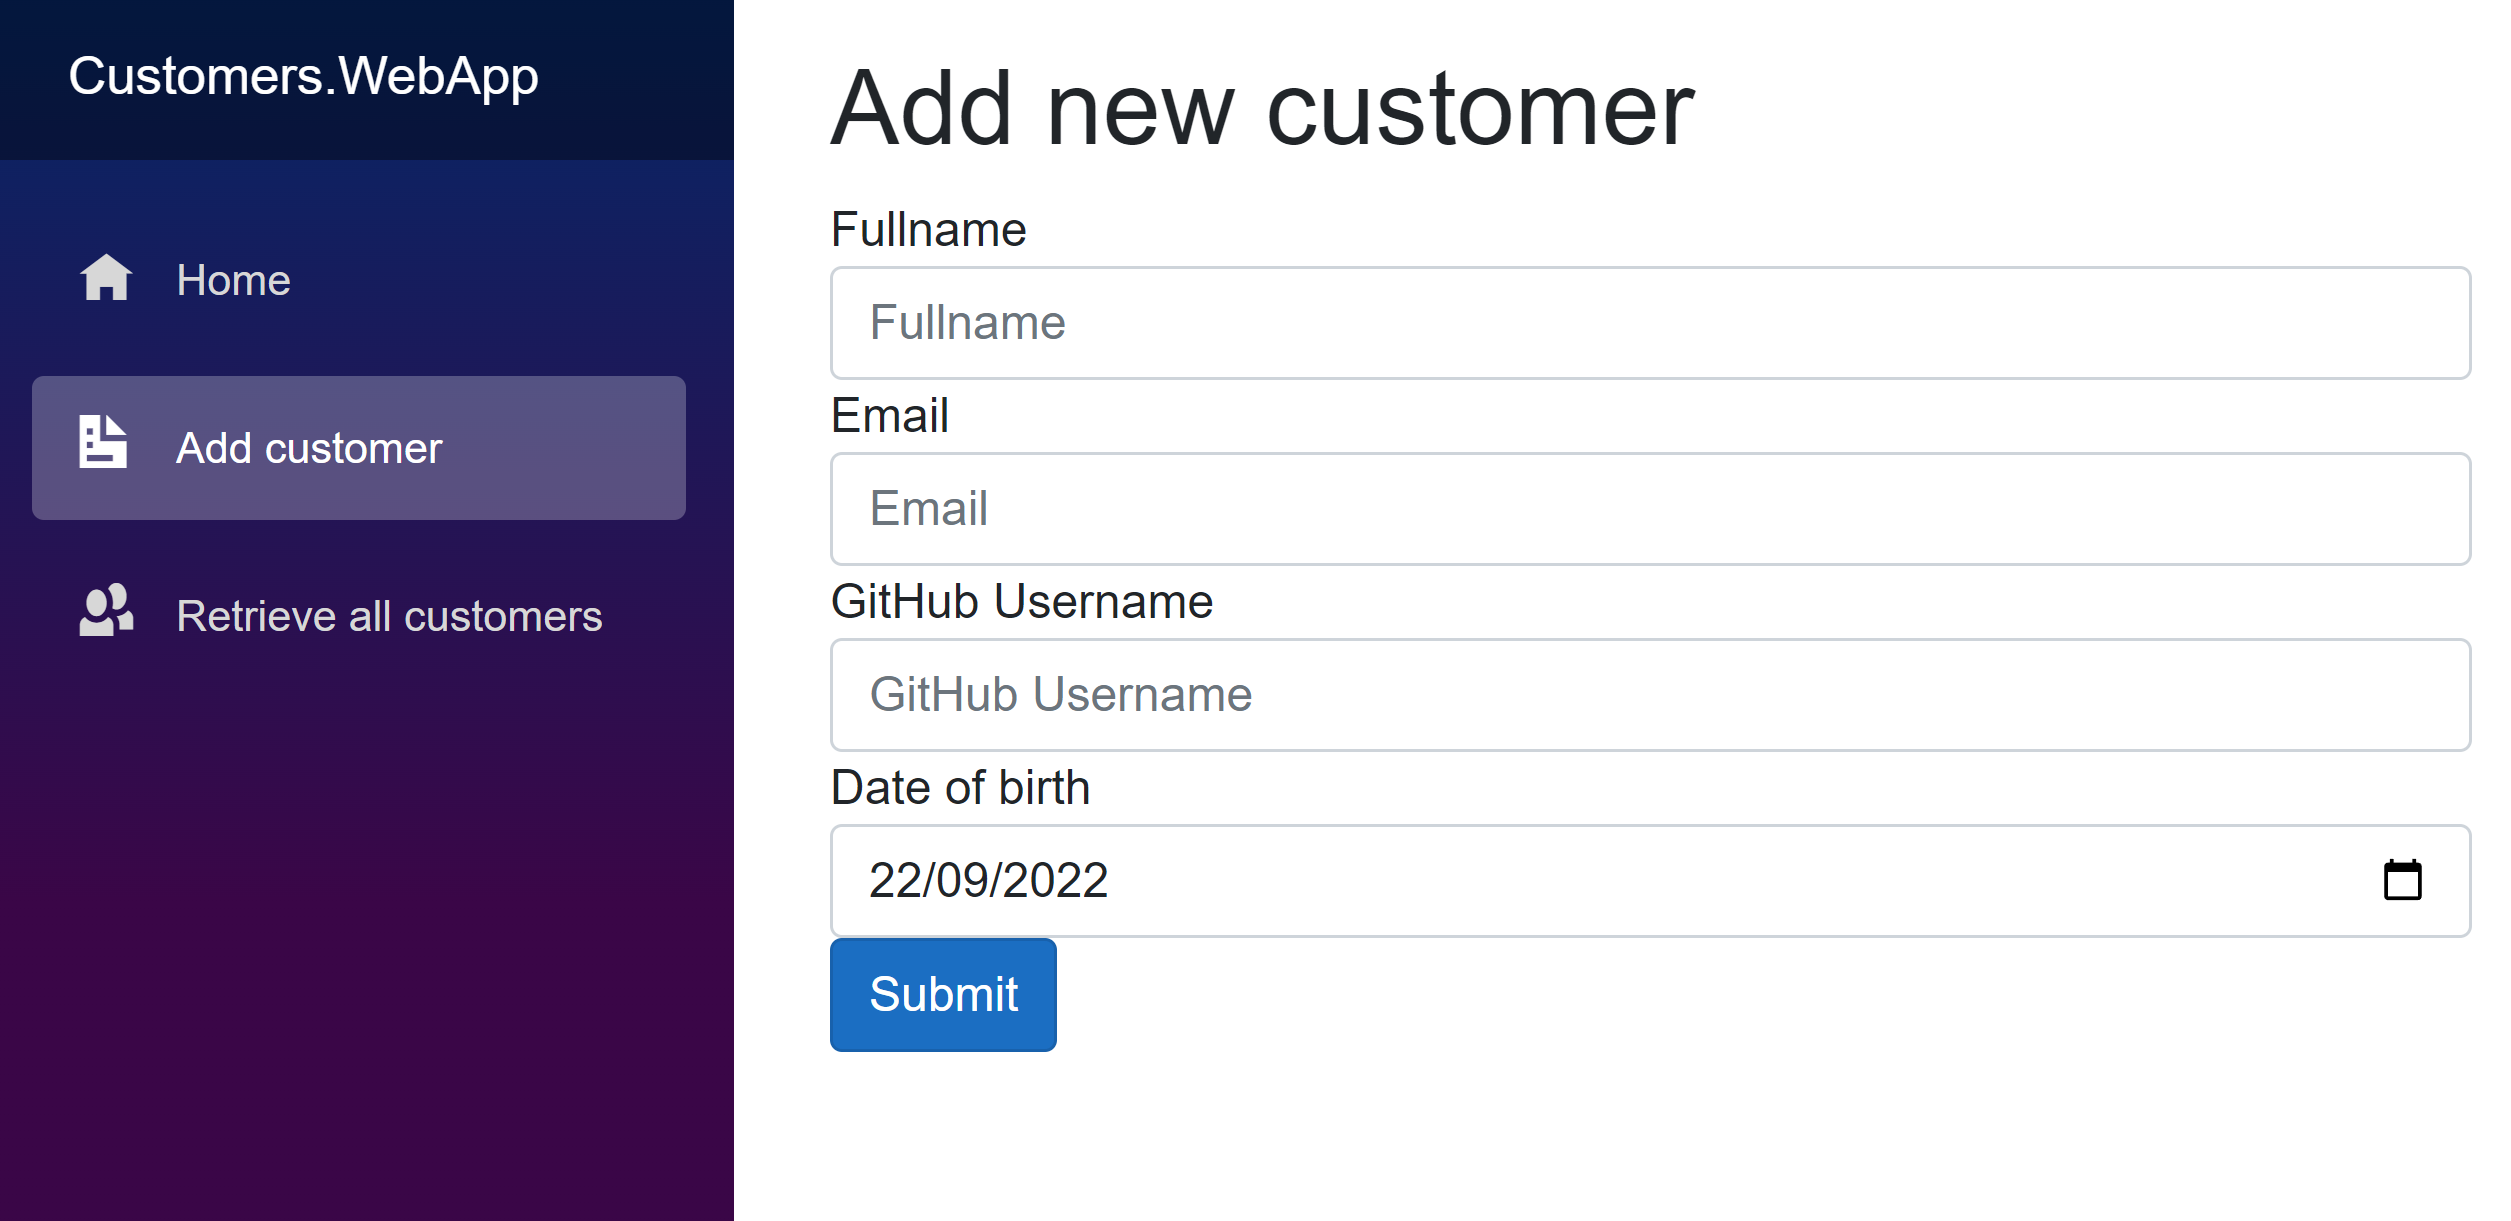
We need to:
- Navigate to
/add-customer - Provide a valid full name
- Provide a valid email
- Provide a valid GitHub username
- Provide a valid date of birth
- Click the submit button
Creating the infrastructure
Let's start by the infrastructure code needed. First we need to create an instance of Playwright itself:
IPlaywright playwright = await Playwright.CreateAsync();
We can then create an instance of the Browser:
IBrowser browser = await playwright.Chromium.LaunchAsync();
However, by default the browser will run headless which means we won't actually see a browser window.
It will also make the actions as fast as it can. To prevent that we will pass a BrowserTypeLaunchOptions object to the LaunchAsync
method to add SlowMo and turn Headless off.
IBrowser browser = await playwright.Chromium.LaunchAsync(new BrowserTypeLaunchOptions
{
    SlowMo = 1000,
    Headless = false
});
Before we create our IPage object we need to create an IBrowserContext. This will allow us to run in an isolated context of the
browser without sharing data such as cookies and it also allows us to ignore invalid HTTPS certificates which can be a pain during testing:
IBrowserContext browserContext = await browser.NewContextAsync(new BrowserNewContextOptions
{
    IgnoreHTTPSErrors = true
});
We can now finally create our IPage object which is what we will be using to interact with the website page:
IPage page = await browserContext.NewPageAsync();
Let's start by navigating to the /add-customer page:
await page.GotoAsync("https://localhost:5001/add-customer");
Let's just try that out first before we move further. Let's add a Dispose call so the browser is properly disposed at the end of the execution and run the console app.
playwright.Dispose();
dotnet run
Interacting with the page
Now that we have the page running let's go ahead and fill in and submit the data. Any interaction will be driven by Locators.
Locators allow us to select elements in a page without having to specify the exact Query Selector, which can be quite tricky and can get out of date, causing our tests to fail.
Another advantage of Locators is that when we write one, the code will wait until that items that we requested is on the page. This means that we don't have to add arbitrary delays in our code for elements to pop up.
Let's take the FullName field for example:
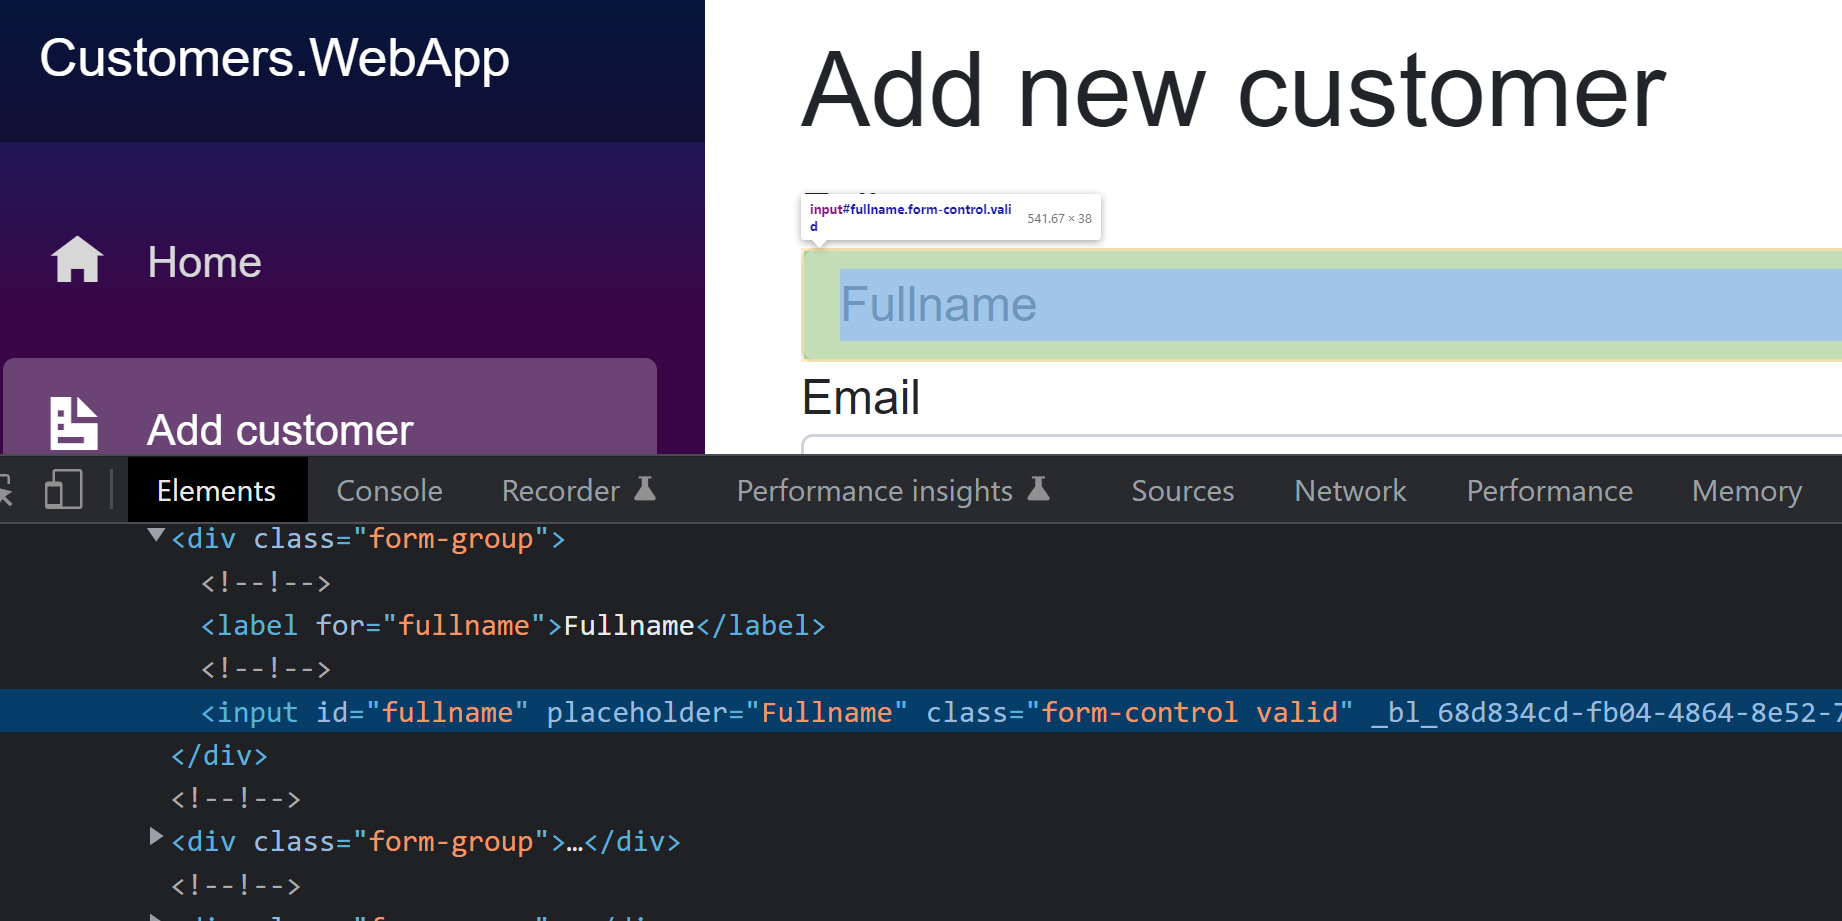
This item can be selected in many different ways from "give me the first input in the page" (which is bad) to give me the element with id=fullname (which is good).
In our case, we can simply use the id of the element since it's present.
page.Locator("id=fullname");
Now that we have the element selected we can use the FillAsync method to set the value:
await page.Locator("id=fullname").FillAsync("Nick Chapsas");
There are many different ways you can select and element with Locators.
Here is a quick cheat sheet:
Text selector
page.Locator("text=Log in");CSS selector
page.Locator("button");
page.Locator("#nav-bar .contact-us-item");
Select by attribute, with css selector
await page.Locator("[data-test=login-button]").ClickAsync();
await page.Locator("[aria-label='Sign in']").ClickAsync();
Combine css and text selectors
await page.Locator("article:has-text(\"Playwright\")").ClickAsync();
await page.Locator("#nav-bar :text(\"Contact us\")").ClickAsync();
Element that contains another, with css selector
await page.Locator(".item-description:has(.item-promo-banner)").ClickAsync();Selecting based on layout, with css selector
await page.Locator("input:right-of(:text(\"Username\"))").ClickAsync();Only visible elements, with css selector
await page.Locator(".login-button:visible").ClickAsync();Pick n-th match
await page.Locator(":nth-match(:text('Buy'), 3)").ClickAsync();XPath selector
await page.Locator("xpath=//button").ClickAsync();React selector (experimental)
await page.Locator("_react=ListItem[text *= 'milk' i]").ClickAsync();Vue selector (experimental)
await page.Locator("_vue=list-item[text *= 'milk' i]").ClickAsync();
For an exhaustive list check out Playwright's documentation.
Let's run the console app again and see what's going to happen this time.
With that working let's fill in the rest of the fields:
await page.Locator("id=email").FillAsync("[email protected]");
await page.Locator("id=github-username").FillAsync("nickchapsas");
await page.Locator("id=dob").FillAsync("1993-09-22");
The last thing we need is to click the submit button.
In this case, our approach is a bit different. We know that the button has the text "Submit"
so we can select the element by its text and use the ClickAsync method to click the button.
await page.Locator("text=Submit").ClickAsync();
And that's it! We can now create a customer with an automated Playwright flow!
We can now integrate Playwright in our test suite.
Test suite integration
It's time to take everything we've learned and use it for our integration test suite.
First, let's create the IPlaywright option and the IBrowserContext object in the TestingContext class.
private readonly IPlaywright _playwright;

public IBrowserContext Browser { get; private set; }
Browser is public because it will be used by the test classes to invoke the NewPageAsync method and create a page to run the tests on.
Now simply update the InitializeAsync method to include the Browser launching:
public async Task InitializeAsync()
{
    GitHubApiServer.Start(9850);
    _dockerService.Start();

    _playwright = await Playwright.CreateAsync();
    var browser = await _playwright.Chromium.LaunchAsync(new BrowserTypeLaunchOptions
    {
        SlowMo = 1000,
        Headless = false
    });

    Browser = await browser.NewContextAsync(new BrowserNewContextOptions
    {
        IgnoreHTTPSErrors = true
    });
}
And the DisposeAsync method to dispose the browser and playwright:
public async Task DisposeAsync()
{
    await Browser.DisposeAsync();
    _playwright.Dispose();
    _dockerService.Dispose();
    GitHubApiServer.Dispose();
}
And that's it! Now it's time to take everything we've learned and write integration tests with it!